Asp .NET 5 Web API + Angular 10: Let's Create a Todo List App (Front End)
Published
•27 min read
L
I am Louay Oudi, a self taught full-stack developer based in Tunisia. My hunger for knowledge pushed me to this programming path and I fell in love with it, I am a smart hustler, a problem solver and a team worker, passionate about progress and a productivity addict, I'm a fan of Calisthenics and indoor activities that's why remote employment is preferred. Will happily work on ambitious projects with positive people
Part 2 - The Front-End
This a beginner friendly tutorial in Angular 10 using TypeScript where I build the front-end that communicates with my previously built REST API with Asp .NET 5

This a completion to Part 1 in which we built the API
Announcement :
Aside from programming I do graphic design, and this blog encouraged me to shift all my life towards programming including graphic design that's why I started DevGoodies which is a print on demand store where create funny/motivational programming related products, so if you want to support me and treat yourself with a piece consider checking it out.
Getting Started
Needed Software :
For this tutorial you will need to install the following software in your device:
For this tutorial you will need to install the following software in your device:
Needed VS Code Extensions :
Now that you've installed the required software, you will need to install couple more vs code extensions to make our life easier, open vs code then open the same folder where we put our API folder, and install the following extensions (if you don't know how to do that check part 1) :
- Angular Language Service
- Angular Snippets
- TsLint
- Material Icon Theme
Installing Angular :
Now that we've got our extensions installed, we need to install Angular which is the framework we will be using to build our Front-End, and fortunately that process is too easy, just open the terminal and paste in the following command :
npm install -g @angular/cli
Now that we've got our extensions installed, we need to install Angular which is the framework we will be using to build our Front-End, and fortunately that process is too easy, just open the terminal and paste in the following command :
npm install -g @angular/cli
Creating The Project :
1. Creating The Angular Project
Make sure the directory that appears in the terminal isn't the directory to your API folder but the folder that holds the API folder, after you've made sure you're in the right directory, it's time to create your first angular project by executing the following command in the terminal :
ng new client
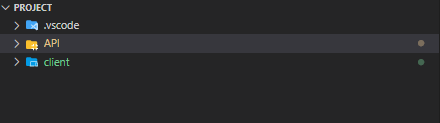
Then you should be asked if you want to use writing and for the sake of simplicity we wont so type N and press enter, you will be also asked to the specify the type of the file you want your stylesheet to be in, we wont cover styling in this blog post so pick whatever you're comfortable with, for beginners I would recommend CSS, After doing everything you should then see a new folder called client appearing and your VS Code folder explorer should look like this :
2. Testing The Angular Project
Cd into the client folder and start the Angular project by executing these two commands :
cd client
ng serve
and then wait a while for the angular project to start, After the completion of the loading you should see a message saying :
Angular Live Development Server is listening on localhost:4200, open your browser on http://localhost:4200/
which means that our app is now running on a development server and to view that, open up a browser and visit this link : http://localhost:4200/ or simply click here. you should see something like this :
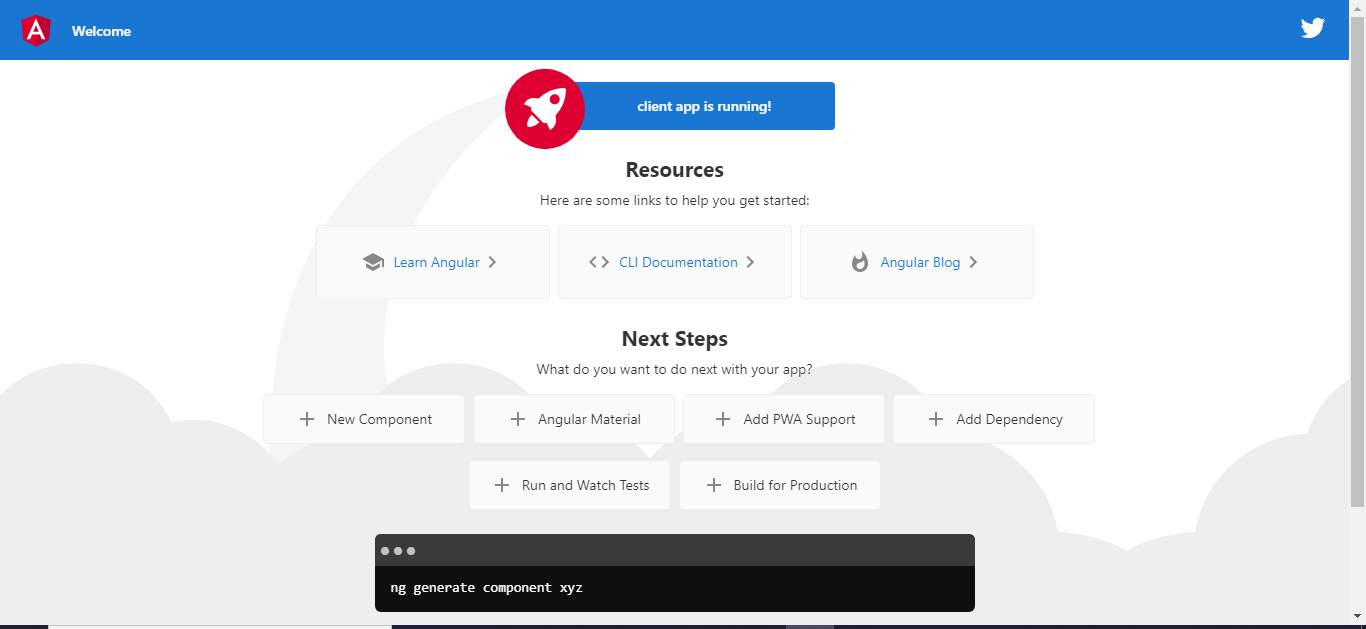
land that is the default UI for any angular app, now as you can see our App is named client which is something we don't like so let's rename it, inside the client folder go to src>app>app.component.ts you should see a code snippet like the following :
import { Component } from '@angular/core';
@Component({
selector: 'app-root',
templateUrl: './app.component.html',
styleUrls: ['./app.component.css']
})
export class AppComponent {
title = 'client';
}
as you've guessed we will change the value of the property title to whatever you want it to be, I will just name it Todo-List, then our app will recompile and the default UI will look like this :

and voila the name of our app has changed.
3. Angular Basics
Angular Basics are too much to cover in this blogpost but as an appreciation for making it till here I wont let you wonder the internet looking for resources to learn, instead here's a FREE Carefully Chosen Course that will teach the basics of Angular and that I myself used it. This course explains angular well but it does not cover advanced topics however it comes with a free E-Book about TypeScript which Angular heavily relies on, so if you don't know angular very well I suggest you spend some time learning the basics and then come back here.
4. Creating Our Service
Creating methods that hit our API is a must here, but creating these methods in our main component will make it crowded with code and according to Angular Docs: Components shouldn't fetch or save data directly and they certainly shouldn't knowingly present fake data. They should focus on presenting data and delegate data access to a service.
That's why we will create a service that we will later inject into our component and you will see its impact in a while, now make sure you're in the client folder and execute the following command on the terminal :
ng g s todo
and in client>src>app you should see a new file called todo.service.ts and the code inside of it should look similar to this :
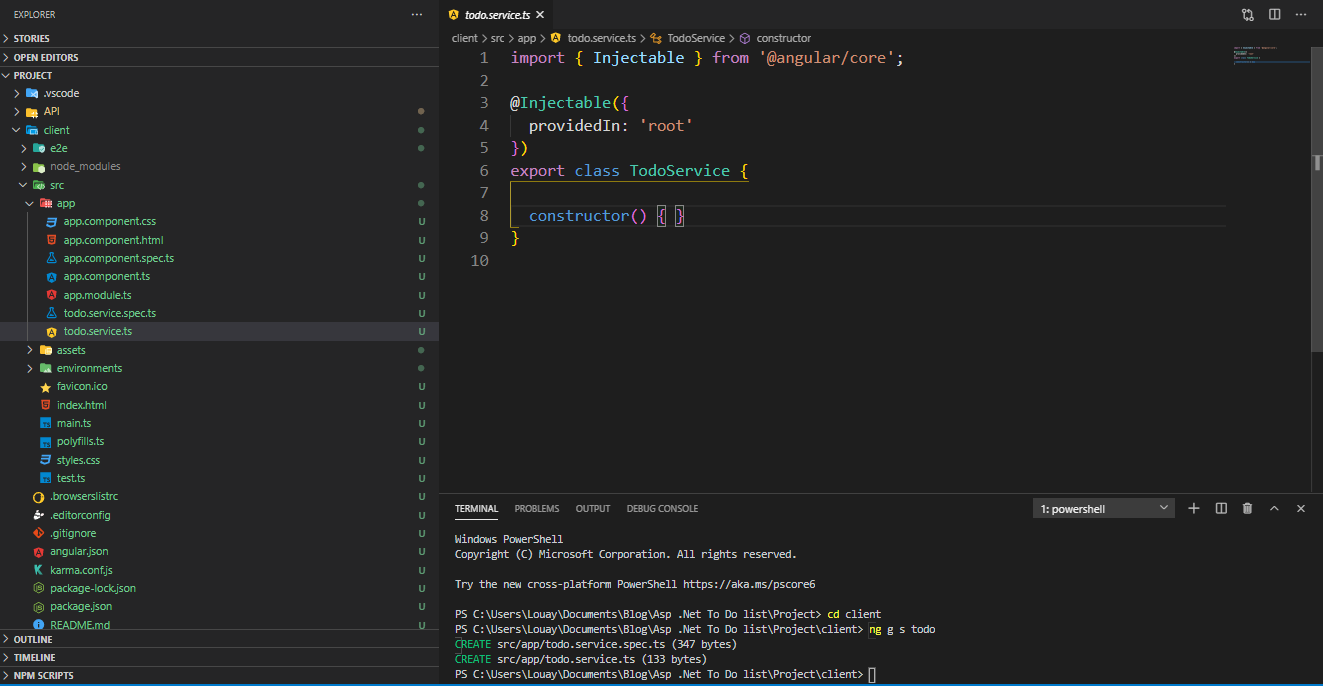
as you can see the class is prefixed with the @Injectable decorator and what that means is that the class participates in the dependency injection system, now lets start coding.
4. Getting Our Hands Dirty
What is the one thing you need to send an HTTP request to a server ? You've probably guessed it right the URL, that's why we need to supply our app with that, so lets create a variable called url and let's pass it the needed value. The new line should look like this
url: string = 'https://localhost:5001/tasks';
and to be able to send http requests, we need to inject the HTTPClient into our service and to do that you should declare it as a parameter in the constructor like the following :
constructor(private http: HttpClient) {}
and in order for that to work you need to import the HTTPClient, angular normally does that automatically but if it didn't here's how you can do it, just add this line on the very top of your service
import { HttpClient } from '@angular/common/http';
and our service should look like this :
import { Injectable } from '@angular/core';
import { HttpClient } from '@angular/common/http';
@Injectable({
providedIn: 'root',
})
export class TodoService {
url: string = 'https://localhost:5001/tasks';
constructor(private http: HttpClient) {}
}
Next we need our HttpClientModule to be accessible everywhere in our app, the steps to achieving that are fortunately simple, go to app.module.ts in src>app and you will see an array of imports there, it should look like the following
imports: [
BrowserModule,
]
Simply add our HttpClientModule to that to make look like this
imports: [
BrowserModule,
HttpClientModule
]
If you run into some issues make sure you have the HttpClientModule imported from
import { HttpClientModule } from '@angular/common/http';
Let's start with our basic get request, for that we need to create a method called GetTodos and the code inside of it should look like this :
GetTodos(){
this.http.get(this.url).subscribe(response =>{
console.log(response);
});
}
We're basically telling our HttpClient to perform a get request and we're passing our URL as a parameter for that request, and the we're subscribing to it to actually trigger it because the http.get() is an observable and we need to subscribe to these to actually trigger them in angular, for more info i recommend you visit this Angular Docs Page and then we will just log the response, let's now test this, we need to first inject our service in our AppComponent, so head to app.components.ts and do the following.
First step is to inject our service into our component and the process is too similar to when we injected the HttpClient into our service before, so simply edit the AppComponent constructor to get something like that :
constructor(private service: TodoService) {}
And Create a method that will be responsible for executing the GetTodos method from our service, the syntax is very common to us C# devs, we will call the method GetTodos as well
GetTodos(){
this.service.GetTodos();
}
As you see we are calling the get todos from our service that is an instance of TodoService.
Now let's test our app, we need to first call the GetTodos, somehow, so let's create a button that will do just that, go to app.component.html and delete all the code in there and replace it with this snippet:
<button (click)="GetTodos()">Get Todos</button>
now when we open our app we should see a blank page with a button named saying Get Todos, and we can't test our API yet because simple we don't have our server running, so lets do just that:
Open a new terminal window by clicking on the "+" icon 

Cd to the API folder and execute
dotnet watch run
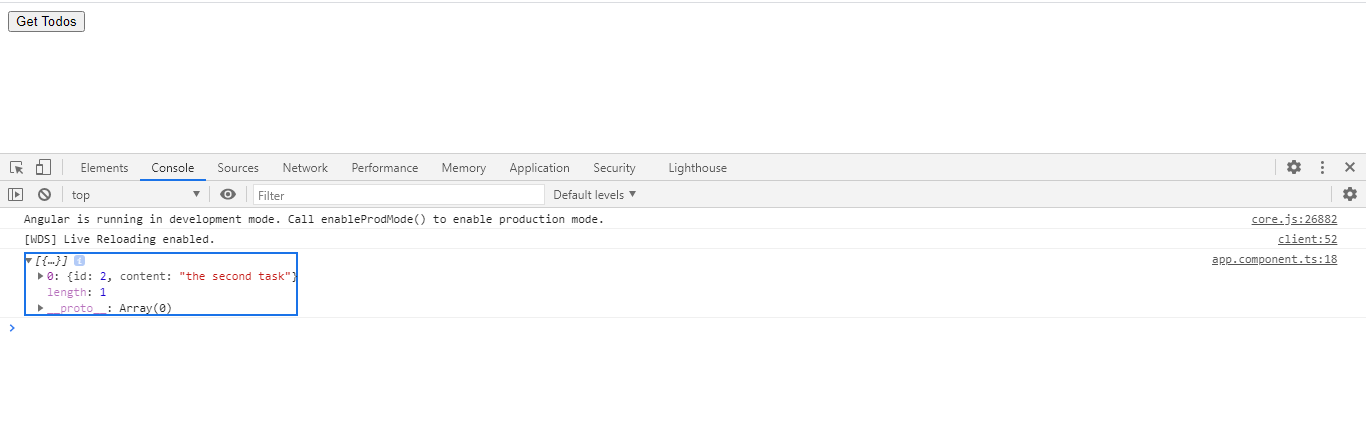
Wait till the server is open and go to our Client interface, open the Console and press the Get Todos Button, you should see something like this:
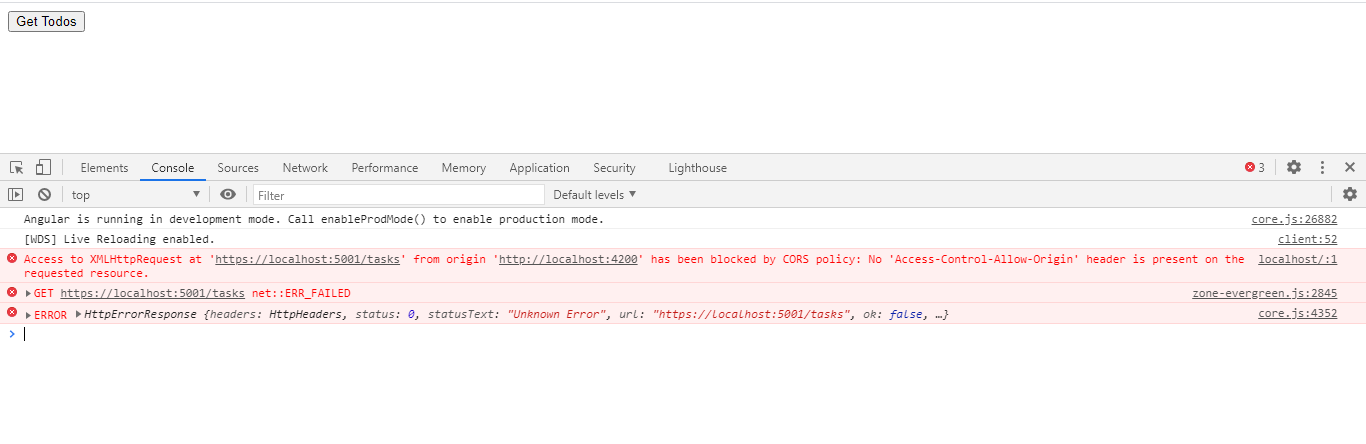
we get an error, and if we dive into it we could tell that the Access has been blocked by CORS policy, which means that our API does not have a policy to accept requests from our client (if you want to deep dive into CORS I would suggest this article). So lets make our API accept requests from this client, go to Startup.cs in our API solution and add the following snippet into our ConfigureServices method first create the variable holding the name of our policy, place this on the very top of the Startup class :
readonly string MyAllowSpecificOrigins =
"_myAllowSpecificOrigins";
and then modify the ConfigureServices method:
services.AddCors(options =>
{
options.AddPolicy(name: MyAllowSpecificOrigins,
builder =>
{
builder.WithOrigins("http://localhost:4200/")
.AllowAnyHeader()
.AllowAnyMethod()
.AllowCredentials()
.SetIsOriginAllowed((host) => true);
});
});
and then go to our Configure method and add this line :
app.UseCors(MyAllowSpecificOrigins);
now our app should be working fine, so let's test it again:

Let's start with our service, basically we will almost change everything to make it look like this :
GetTodos() {
return this.http.get(this.url,{
observe: 'response',
}).pipe(map((response) => {
return response.body;
}));
}
we modified our method so we're dealing with observables which is the best option when it comes to passing values. And then lets move to our GetTodos method that is in our component and replace it with the following, and lets add a Console.log() statement to verify that everything is fine, you'll understand what I mean in a second :
GetTodos(){
this.service.GetTodos().subscribe(data =>{
this.todos = data;
console.log(this.todos);
});
}
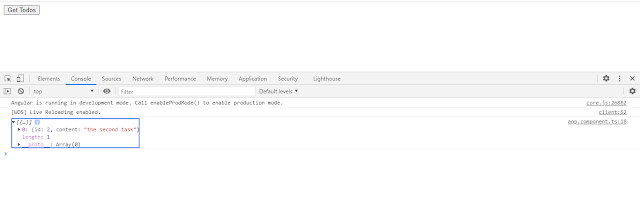
in now that the return type of the GetTodos from the service is an observable, we will subscribe to that and get the data and pass it to our todos variable that we created and then we log that, so let's see what we get :
and there we go our response is what it's supposed to be, now lets display these in our web app, we will add this simple angular syntax into our app.component.html (you should've learnt this syntax in the free course I mentionned or on your own) :

our html is displaying what we get from our response. now let's make a simple post request, we will add a simple form with a button called Add Task, the html for that is the following :
<ul>
<li ngFor="let todo of todos">{{todo.content}}</li>
</ul>
Now let's test our app and voila :

our html is displaying what we get from our response. now let's make a simple post request, we will add a simple form with a button called Add Task, the html for that is the following :
<input type="text">
<button>Add Task</button>
now let's add a variable in our app component that will hold the content of the input, lets call it content and let's use angular syntax to two-way bind the input with that variable, the new input should look like this :
<input type="text"
[(ngModel)]="content"
[ngModelOptions]="{standalone: true}">
you should see errors if you just copy pasted that part into your app, because here you need to go app.module.ts and into the imports array add a reference to FormsModule the new array should look like this :
imports: [
BrowserModule,
HttpClientModule,
FormsModule
]
now what is left is to create our post method, so let's head to our service again and create the required method, but we know that in our POST request there are headers that we need to pass, so lets create a variable called headers of type HttpHeaders and pass it some values, like the following :
headers = new HttpHeaders().
set('Content-Type', 'application/json');
and then lets create the method that should look like this :
PostTodo(todo){
this.http.post(this.url,todo,{
headers : this.headers,
responseType: 'text'
}).subscribe(response =>{
console.log(response);
});
}
as you can see, the method requires a parameter which is a todo, but what that that to do is, it is simply an object that we will create in a while, then we will pass that todo to our POST request, in the body, and you probably wonder where that content will be coming from, and the answer is that we will get from the value of our input, so let's do that, go to our app component, first create a folder called Models in src>app and inside of it create a new file called and name it Todo.ts then we will declare a class inside that file which should look similar to what we do in C# except it is prefixed with export and then we add some properties to it and it should look like this :
export class Todo
{
id:number;
content:string;
}
as you can see, we got some properties, id and content which is what is required from us to send to the api, now let's head to our app.component.ts and create the PostTodo method :
PostTodo() {
let todo = new Todo();
todo.content = this.content;
if (todo.content) {
this.service.PostTodo(todo);
}
setTimeout(() => {
this.GetTodos();
}, 1000);
}
basically we created an instance of our Todo object, then we're passing the values from our input box to its content property and we are checking if the content is not null, if so we send the request, if not we do nothing, and after sending the POST request , we will resend the GET request in order to update the displayed data, but we are waiting one second (1000ms) before we do that, so our app has the time to complete the request, I took this approach for the sake of simplicity but you can go further than that and make it more responsive on your own but for now this is enough, so now lets make hitting the Add Todo button performs the method we just created it and lets test it, the new method syntax should look like this:
<button (click)="PostTodo()">Add Task</button>
and now let's test our client, type the task content in the input box and click Add Task :
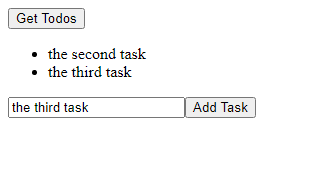
as you could see our third task has been added to the database successfully, now the last thing to do is implement the DELETE request, for that we will need to add a delete button on the side of every task, so we need to modify the current html into something like this :
<ul>
<li ngFor="let todo of todos">{{todo.content}}
<button>Delete</button>
</li>
</ul>
now let's create the Delete method, let's head on to our service and create the following method,
DeleteTodo(id){
this.http.delete(this.url +'/'+id)
.subscribe(response =>{
console.log(response);
});
}
the code here explains itself, we are required to pass the id of the object, then we build the new URL with that id, and we send the DELETE request to that URL, now let's head out to our app.component.ts and create the DeleteTodo function there as well, and it should look like this :
DeleteTodo(id){
this.service.DeleteTodo(id);
setTimeout(() => {
this.GetTodos();
}, 1000);
}
we are required once again to pass and id parameter and then pass that same id to our service.DeleteTodo() method, how will we get that id param you wonder ? the asnwer is simple :
<li *ngFor="let todo of todos">{{todo.content}}
<button (click)="DeleteTodo(todo.id)">Delete</button>
</li>
Now your app is technically Finished all what is left is to test the Delete method :
and voila, Congratulations on this milestone, you created your first functional full-stack app, hope this is the beginning of a successful programming career for you.
HOMEWORK
Now that you've learned how to use Angular, you will need to do your researches and figure out a way to modify existing tasks, to help you out I will give you some hints and an example to start,
Hints
Hint 1 : the Request type of this method is called PUT
Hint 2 : the method will receive 2 paramaters (int id, Task task)
Hint 3 : Display the tasks in a form instead of a label, modifying that form and hitting the update button will update the task

Also the app right now looks ugly, so try to style it and send me what you've done either on my socials or via the contact form, and the best one will get featured here.
Final Words :
Congratulations again, you have completed your first full-stack web app, you're now in the programming game, and always remember that constantly learning is the way to succeed, there's still a long journey ahead of us because I'm still learning as well good luck for us and especially for you and hope you kickstart your programming career


